
Learn math, eat cookies.
A quick trip down memory lane, and the last chocolate chip cookie recipe you’ll need.
It started 11 years ago, in December of 2015. Ousted from university and stuck in dead-end relationship (sorry Skye, truth hurts) I decided it was time to try something a little different. I told my rather-conservative-when-it-comes-to-education parents that I was applying to pastry school. They were just relieved that I did, in fact, want to continue my education. I would not go on to graduate (surprise, surprise) but it got me out of the house and off on my Great Toronto Adventure (my GTA if you will, not to be confused with the Greater Toronto Area which no one outside of Ontario has heard of).
I committed to one of year of the two year Baking and Pastry Arts Management Program at George Brown College. I would later find out there was a continuing education program that was half the price, only 3 days a week, and did not include any of the core college credits that would sigh waste my time. Did I really need to take “Mathematics for Hospitality” after studying calculus and linnear algebra? My appeal to be excused from this class was met with what could have only been a challenge: “just do really well in the class”.
Aspiring chefs and restauranteurs, take note: you need to know math to survive in this industry. Your recipes and cost control methods revolve entirely around percentages, ratios, the ability to add and subtract at lightning speed, and being able to convert grams to ounces on demand.
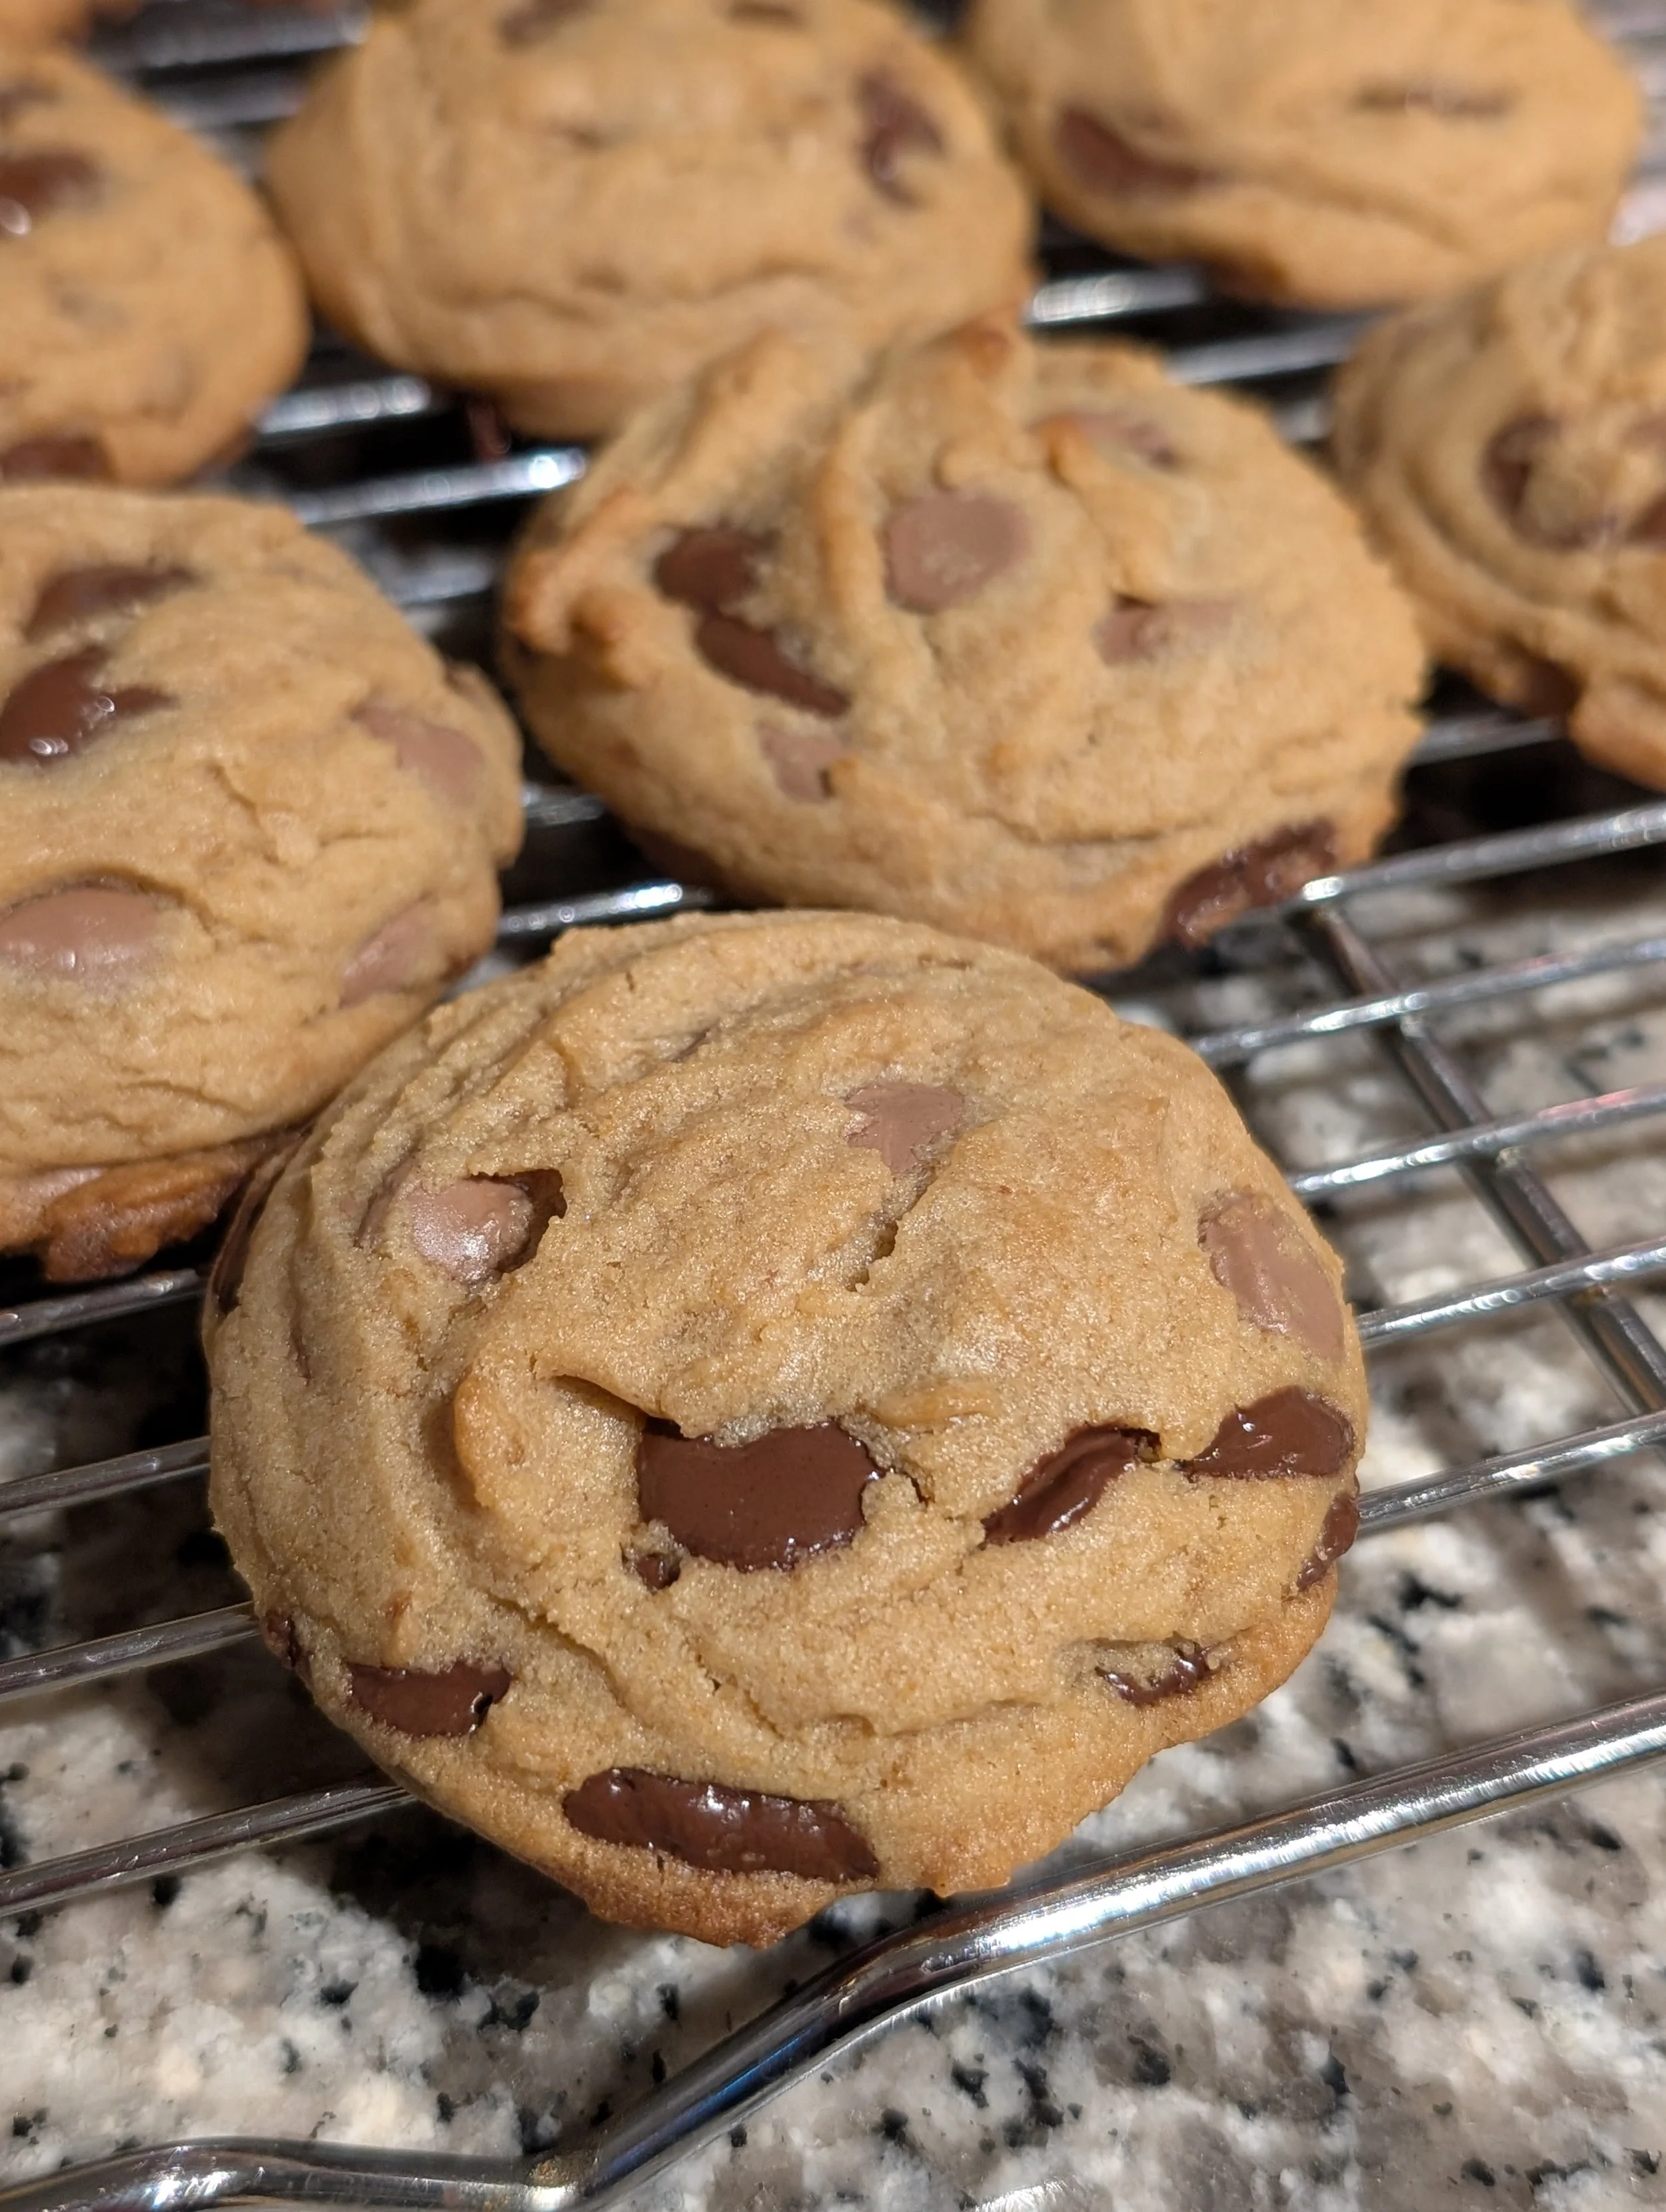
Case in point. Baking is math.
Without knowing basic math, you can’t scale your recipes or prepare a P&L. Sure, AI and ChatGPT can do it for you in the blink of an eye, but unless you know what you’re looking at, what use is it to you? Needless to say (but I’ll say it anyway) I did really well in that math class.
I was introduced to many new things at George Brown: state of the art commercial kitchens and the fancy (read: expensive and dangerous) appliances that came with them; chef coats and “toques” (the absurdly tall yet necessary chef hat students were forced to wear as part of our uniform); tempering chocolate (messy, useless) and, of course, the line-up of teachers employed to shape our futures as Chefs.
The good news was all the Chefs employed by the hospitality school had to have worked in the industry at some point. Some of them left us wondering just how long they’d actually lasted or when they plated their last dish.
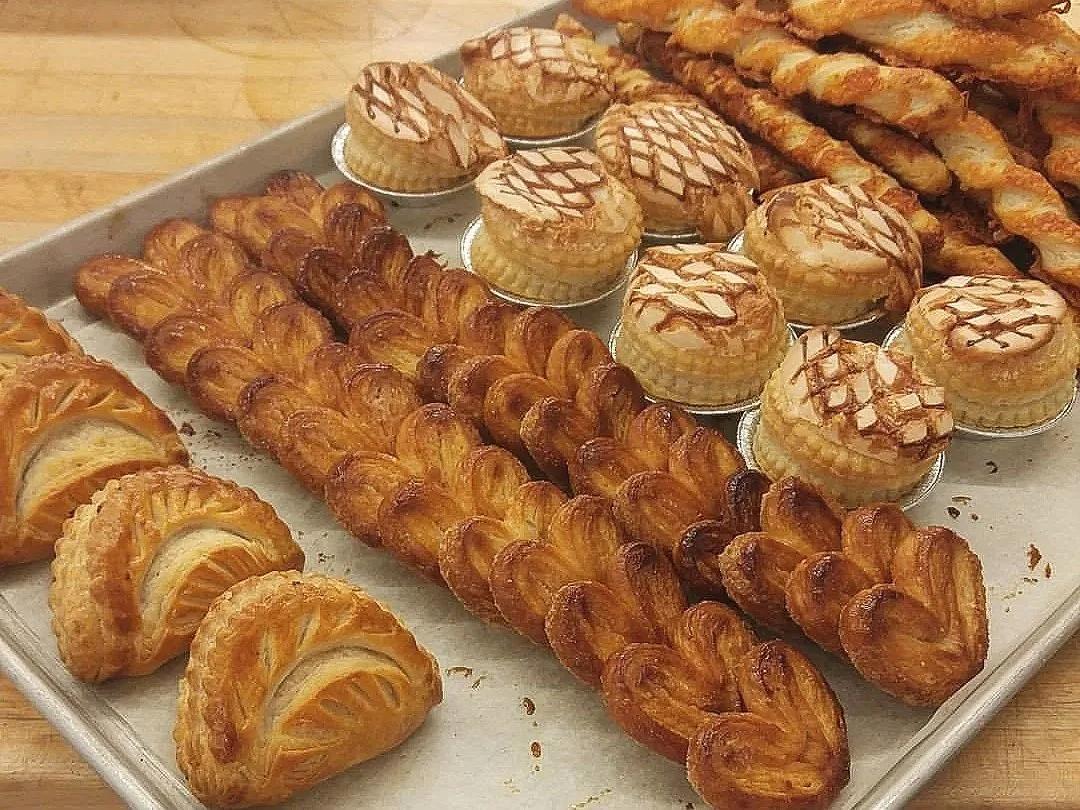
So delicious, so dated.
Although my “Baking and Pastry Arts II” Chef left something to be desired (a washed-out Italian Bakery owner of many years, determined to keep his old-fashioned creations alive by ensuring we knew how to use a stainless steel cake comb), I remained cautiously optimistic due to, who else, the female Chefs who would guide our success. I started off strong with none other than Chef Joanne Yolles leading us in our introduction to baking and pastry arts. A veteran of the Toronto restaurant industry, she was directly responsible for putting Scaramouche on the map, along with their signature Coconut Cream Pie (still perfect), and she’s probably indirectly responsible for the shenanigans I’ve gotten up to for the last 10 years (not that she knows it. The last time I ran into her at the restaurant I managed I almost fainted I fangirled so hard).
Halfway through the semester, George Brown pulled a bait-and-switch on us and replaced capable, no-nonsense Chef Yolles with Chef Tracey Freeman. With over a decade of experience in bakeries in Toronto, Chef Freeman got us through early mornings (how was she so cheerful so early in the day?) and terribly boring classes (we’d catch her sitting in on her bestie Chef Fleming’s Intro to Baking Theory class). One day, she even brought us treats (“us” being the small coterie of classmates I have since lost touch with but still follow on Instagram). The next class, she brought us chocolate chip cookies.
And what a cookie it was.
Perfectly chewy, not too sweet, not too cakey, exactly what a chocolate chip cookie should be. When I asked her for the recipe she had to think about it for a bit. I assumed it was a secret and she was entrusting me with something precious. I now realize she was probably making it up on the spot, using her experience to guide her since she probably didn’t measure anything when she made these.
Chef Freeman’s recipe makes a perfect cookie, every time, but like with so many things in life, my experience may not be the same as yours. There are a few things to keep in mind when preparing someone else’s recipes.
FLOUR: What brand of flour did they use? This, in my professional opinion, might be the number one contributing factor to recipe failure (this, and aspiring bakers’ inexplicable need to replace ingredients willy nilly—see r/ididnthaveeggs for giggles and how not to cook). Different brands and types of flour have different protein and humidity percentages (humidity from your house, the grocery store, the warehouse it was stored in, the moldy shipping container it sat in for weeks in the damp port, etc…) and bread flour and all purpose flour are not interchangeable. King Arthur flour is not the same as that artisinal fresh-milled product you purchase from your local bakery (nutrients! bacteria! moisture levels!) and your two-year-old bag of flour from the nearby Loblaws is probably not going to react the same way as that fresh-milled goodness. The point is, try and use the same flour the recipe calls for and try not to bake with flour that’s been sitting in your pantry for more than 6 months. You totally can, it just might not turn out the same way so manage your expectations accordingly.
REPLACEMENTS: I mentioned replacements briefly but this is a big problem for recipe developers, especially in today’s climate of “Protein is Everything and Sugar is Source of all Evil and Also Autism Probably”. Please don’t just replace your sugar with maple syrup or honey or agave or date or coconut sugar and expect the same results unless the recipe specifically tells you that you can. White and brown sugars have different moisture retention levels (they are “hygroscopic” meaning they absorb water and liquid at different rates) and using a liquid sugar instead of a dry sugar will seriously upset your recipe. Baking is a ratio. It’s flour:sugar:fat. Your flour to sugar ratio has been taken into account when developing a recipe so don’t think for a second that you can just replace the second most populous item in the recipe with a liquid and think it will turn out the same. Ditto for reducing the amount of sugar. Experience has taught that you can reduce up to 20% of the total amount of sugar in a recipe. Reality suggests that there may be a 20% difference between my recipe and the author but the result is still within the acceptable margin of error.
READ THE RECIPE: this may seem obvious to the seasoned baker, but did you actually read the recipe all the way through before starting? As guilty as I am of starting a recipe and realizing halfway through that there is a significant rest stage for something I need right now, or starting with ALL the water instead of holding back half of it as stated in step 3, don’t make the same mistakes I did. We have a saying amongst professionals: RTFM. If you don’t know what this means, congratulations, you’ve never had to call an expert with a stupid question or request that seems obvious to the well-informed. In this case, it would be “RTFR”, but the message remains the same.
CHEF FREEMAN’S UPCYCLED COOKIES (the recipe as written in my notebook)
113g Softened Butter (1 stick)
200g Brown Sugar
1tbsp Vanilla Extract
1tsp Kosher Salt
1 Egg
210g All Purpose Flour
4g Baking Powder
Salt & Vanilla
Mix-ins of choice
That’s it. Makes these:
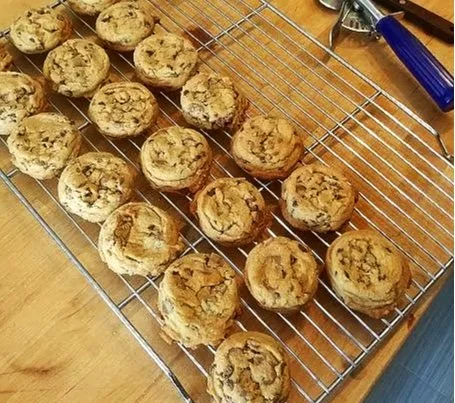
I have since made these dozens of times and, yes, I measure with a scale and use a scoop each time to portion the dough. How else do you get perfectly round biscuits with slightly crinkly tops?
For the adventurous baker, this recipe is an ideal starting point. No white sugar, only brown. No baking soda, no chocolate to flour ratio and, of course, no instructions. For the average home baker, useless.
So, how to make these cookies?
For starters, a basic chocolate cookie recipe will look something like this:
The butter to flour percentage will be around 53-58% butter for 100% flour (eg. for every 100g of flour you’re using 53-58g butter). That percentage decreases with the amount of sugar (a normal cookie recipe uses almost equal parts flour and sugar). This works particularly well in this recipe because there’s no white sugar so you don’t get that tooth-aching saccharine sweetness (sorry Sally, I love you and your sugar addiction, but it’s true). However, because there’s no white sugar, the cookies may not spread enough, since spread is typically attributed to granulated sugar, so we have to employ some tried-and-true techniques to avoid cookie-tastrophe.
Next, we know that there’s only so many ways to mix a cookie, given the list of ingredients we have to work with. I think we can safely assume this is not a “seperate the egg and whisk the egg white until airy and fold in at the end” recipe (remember to read the recipes all the way through because this is exactly how to make coconut macaroons. Obviously we are not making coconut macaroons but you get the picture). And note that the recipe specifically says “softened” and not “melted” butter, so this is not a straight mix cookie (in which the liquids are mixed until homogenous and the dry ingredients folded in so as to not develop too much gluten thus producing a cakey, dense cookie).
So, by process of elimination, we are clearly using The Creaming Method for this cookie, which is as follows:
-Place the softened butter and sugar in the bowl of a stand mixer fitted with the paddle attachment (or use a hand mixer with the paddle attachments or, if you’re feeling particularly feisty, a wooden spoon and lots of determination)
Most recipes call to mix the dry ingredients separately (flour, powders, cornstarch—if using, and salt). I actually like to add the salt AND the vanilla to the butter/sugar mixture. I find it develops better flavor and is more homogenous.
-Add the salt and vanilla to the butter and sugar and start mixing on low speed until fully incorporated. Increase the speed to medium, or start beating the butter mixture with greater enthusiasm, and cream the mixture for anywhere between 7 and 10 minutes. This may take longer if mixing by hand. I suggest you rethink how much you value your time and purchase a stand mixer. They are readily available and well-priced on Facebook Marketplace. And don’t forget to scrape down the bowl every couple of minutes; your mixer doesn’t get to the very bottom of the bowl and the sides don’t get fully incorporated either, leaving gritty streaks of butter and sugar.
Note that we are not mixing on high speed. We want the color to change from light brown to an even lighter shade of beige but what we do not want is to incorporate air pockets, which can cause unpleasant and cakey textures in the final product. This takes time, so be patient.
-Once you’ve achieved the desired “light and fluffy” descriptor, beat in your egg (or eggs, scraping down the sides of the bowl between additions. Don’t skip this step). Don’t over-mix at this stage; we want the egg mixed in until fully incorporated, but not whipped or aerated. We now want to avoid adding additional air into our mixture.
I also like to add any mix-ins (chocolate, nuts, sprinkles, whatever) at this stage, because we risk over-mixing if we add them after we’ve added the flour.
-Add your whisked and/or sifted dry ingredients (unless your flour is super clumpy or old, no need to sift it, just whisk all the dry ingredients together in a bowl). If you’re making a particularly large batch, you can add the flour in stages, making sure it’s fully incorporated before adding more. If you’re just making cookies at home, dump it all in and crank that stand mixer!
I’m kidding, don’t do that unless you’re prepared to deal with the fallout of the cookie-pocalypse and wipe flour off every surface of your kitchen.
-Fold the flour in by hand until no streaks remain or VERY GENTLY mix everything together in your mixer.
Many recipes call for you to chill the dough before baking. I like to portion the dough and then chill it because I already have arthritis in my hands from scooping dough and squeezing pastry bags so I like to do things the smart way, not the hard way.
Another beautiful maxim from the hospitality industry is “Work smarter, not harder” which is both apt and, depending on the situation, incredibly passive agressive, much like the industry as a whole
Typically, chocolate chip cookies like to be baked at a slightly lower temperature (325F as opposed to 350F). This allows the cookies to spread as much as possible before setting and also keeps caramelization to a minimum (you can read about Maillard Browning here. I will not be discussing this today). Basically it’s the perfect temperature to watch your cookies as they bake. If you have a still oven (no fan) increase the temperature to 350F and position the rack firmly in the middle of your oven. Bear in mind that most recipe developers are using a convection oven for their bakes. Temperature control may be the reason your cookies spread too much and look anemic (an actual term used in bakeries to describe pale or pasty-looking products).
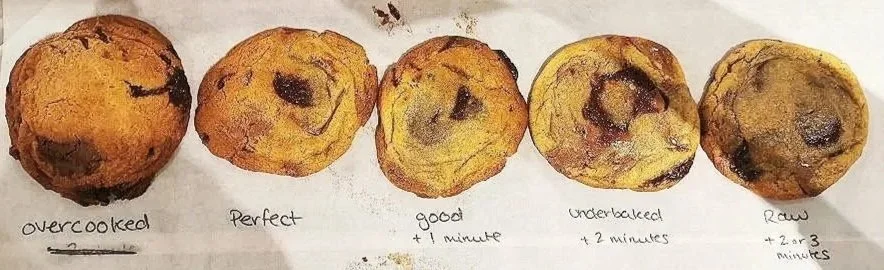
Some people like an under/over baked cookie. Overcooked means crunchy, underbaked means cookie-dough-flavored. To each their own. Use this (admitedly rough) guide to determine your preference. A slightly shiny cookie usually indicates under-done-ness
So, we’re mixing using a creaming method (remember, baking is just memorizing methods and ratios), but “mix ins of choice” is still causing you some grief. Personally, I like to do equal parts mix-ins and flour. So in this case at least 200g of chocolate chips (a mixture of milk and dark callebaut callets are always a good move. If you like chocolate puddles, look for chocolate wafers, specifically the Belcocade brand).
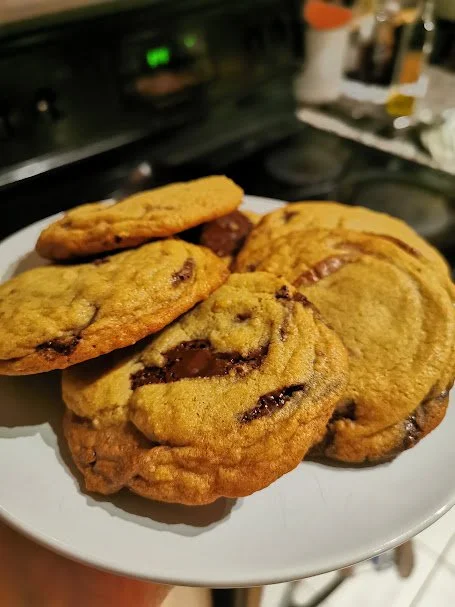
Just gorgeous...
We’ve sorted out the chocolate conundrum, but what about that missing baking soda? “Soda Spreads, Powder Puffs” (the mnemonic we learned in pastry school when trying to remember which leavening agent to use). Most chocolate chip cookie recipes call for both baking powder and baking soda. I can only imagine that Chef Freeman, in all her wisdom, either deliberately omitted it as a baking theory exercise or, more likely, simply forgot to include it in the recipe. Both scenarios require troubleshooting and exploration as to how to get a recipe to do exactly what you want it to do. In this case, we want the cookies to spread. So go ahead and add an equal amount of baking soda as baking powder to your dry ingredients and mix mix mix.
We are now left with the final question: to chill, or not to chill? Baking is the sort of activity that separates those with patience and those who would rather eat raw cookie dough than wait for a cookie recipe to hydrate properly. I, thankfully, am the former. My sister, unfortunately, is the latter so I make sure to leave some cookie dough for her whenever I prepare a batch. Gross, I know.
Chilling the dough is important for two reasons:
The dough needs to be properly hydrated prior to baking. If you’ve ever baked a loaf of bread, you’ve probably heard the term Autolyse thrown around a bunch. The main goal of the bench rest, or Autolyse, is to give the flour time to properly absorb the moisture and give you a better idea of what the dough will be like to work with (it also allows whatever gluten you’ve developed to relax but alas, a story for another time). Hydrating the dough gives your cookies a better texture and flavor. You don’t always have to chill your dough before baking, but I recommend at least 15-30 minutes wait before portioning and baking.
The butter needs time to firm up. This is especially important if your dough was mixed with melted butter. If you used a creaming method with softened butter, a 30 minute rest at room temperature is probably adequate. If your recipe calls for more white sugar than brown sugar, I recommend 30 minutes to an hour in the fridge regardless of method because that white sugar is going to cause the cookies to spread more. Many recipes call for a 2 hour to overnight rest. I say to hell with that. Portion your dough and chill it for an hour. Baking is science for hungry people, emphasis on hungry.
Now that you’re a cookie-baking expert, please enjoy this recipe:
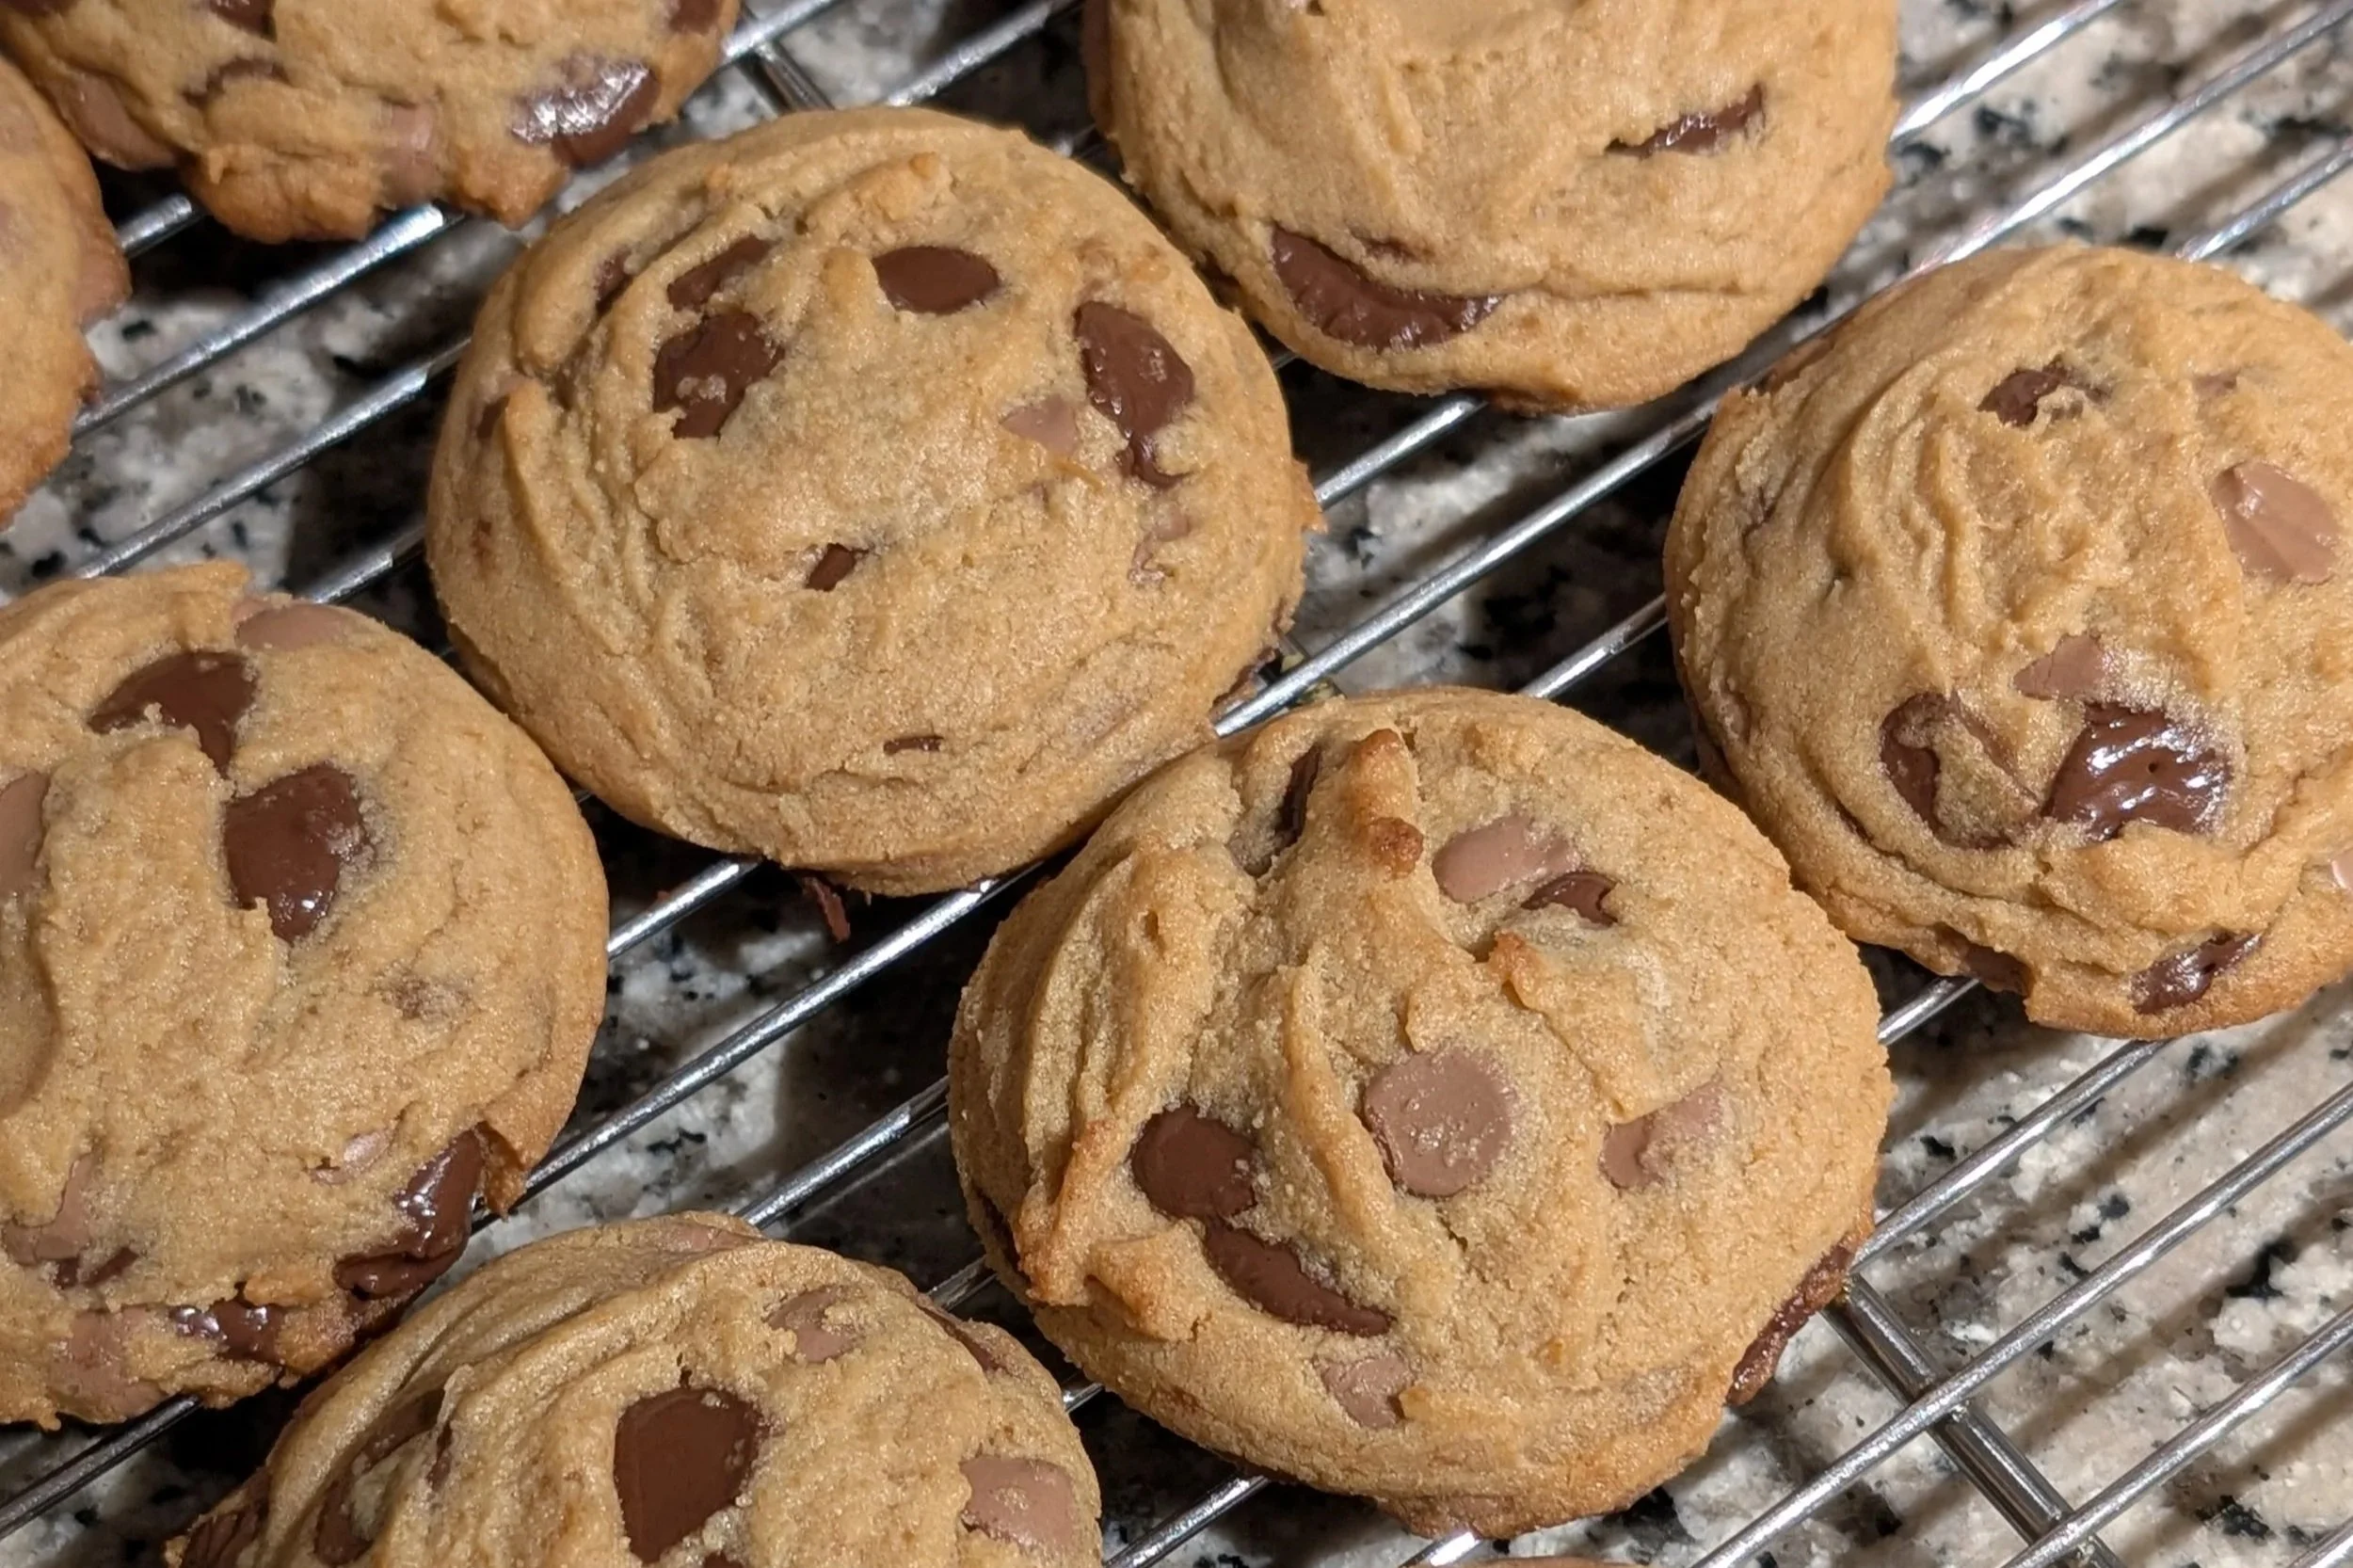
THE BEST CHOCOLATE CHIP COOKIES
113g (1 Stick) Unsalted Butter, Softened)
200g Dark Brown Sugar
2tsp Salt
1TBSP Vanilla Extract
1 Egg
210g All Purpose Flour
4g Baking Powder
4g Baking Soda
100g Milk Chocolate Chips
100g Dark Chocolate Chips
In the bowl of a mixer fitted with the paddle attachment, cream the butter, sugar, salt, and vanilla until light and fluffy (7-10 minutes), scraping down the sides of the bowl every so often.
Add the egg and mix until just incorporated (30 seconds-1 minute).
Add chocolate and mix until evenly distributed.
Whisk dry flour, baking powder and soda together in a separate bowl. Add to wet ingredients and mix until just combined and no streaks remain.
Using a 1oz (30g) or 1.5oz (50g) cookie scoop, portion cookies onto a clean tray or lidded container. Refrigerate 30 minutes to an hour.
Preheat your oven to 325F. Space cookies 1.5-2 inches apart on a baking tray and bake 8-14 minutes (check at the 8 minute mark and rotate the tray so the cookies bake evenly).
Let cookies rest 2-3 minutes on tray before moving to a cooling rack and digging in.
For an even more decadent cookie-baking experience, try my Brown-Butter Miso Chocolate Chip cookies here.
